Saturday, April 19, 2014


Avast! Free Antivirus is an efficient and comprehensive antivirus program. It is one of the most popular antivirus programs available, thanks to the reliable and trustworthy brand that Avast have created. The key features that continue to make Avast! Free Antivirus so popular are the easy UI, optimized scanning options and continuously updated database of virus definitions.


Simple, improved UI
The 2014 version includes a much simpler and quicker to use UI. Key features can be easily reached in the sidebar and the homepage is now customizable so you can access the tools you use most often directly. The overall appearance is clean and uncluttered, with buttons intuitively labelled and positioned.
Comprehensive Protection
Avast are constantly updating their database of virus definitions, meaning your computer will be protected against the latest spyware, viruses and potentially hazardous websites. Avast’s large and active community quickly alerts the development team of new security threats which are swiftly countered and added to Avast’s significant database. The browser add-on further improves computer security with features like cookie and social tracking blocking.
Speed
Avast! Free Antivirus comes with 5 standard scanning options based on depth and speed. Rapid scan will suffice in most cases - targeting removable media and the files you select, identifying security threats in usually less than a minute. A startup scan will launch automatically on boot up and is a useful, regular security check. The optimized scan engine in the 2014 version means scanning of text content is 10 times faster than previous versions. Scanning of EXE files is around 2 times faster. Improved memory usage means Avast! Free Antivirus should cause less strain on your system so you can continue with other tasks faster.
Summary
Avast! Free Antivirus is definitely one of the best free total security managers available. It is relatively lightweight and efficient, while still providing comprehensive security protection. The browser add on can slow browsing speed and the scanning might not be as detailed as some premium antivirus options. But the simple, effective UI and strong security capabilities make Avast! Free Antivirus a very good choice for those looking for free computer security.

DOWNLOAD LINK : CLICK HERE

Google’s game changing browser Chrome combines sophisticated technology with a simple UI, to create a faster, safer and easier browsing experience. Launched in 2008, Google Chrome quickly dominated the browser market to become the most used browser globally within 4 years of its public release. Google’s rapid and continuous development cycle ensures the browser continues to compete with the other most popular and advanced web browsers available.


Speed
Perhaps the area Google invested most of its development time to differentiate from other browsers. Google Chrome launches extremely quickly from your desktop, runs applications at speed thanks to a powerful JavaScript engine and loads pages rapidly using the WebKit open source rendering engine. Add to this quicker search and navigation options from the simplified UI and you have a browser that is pretty hard to beat on speed.
Clean, simple UI
Google Chrome’s most striking feature and a substantial factor in its popularity - the simple UI hasn’t changed much since the beta launch in 2008. Google focused on trimming down unnecessary toolbar space to maximise browsing real estate. The browser is made up of 3 rows of tools, the top layer horizontally stacks automatically adjusting tabs, next to a simple new tabs icon and the standard minimize, expand & close windows controls. The middle row includes 3 navigation controls (Back, Forward & Stop/Refresh), a URL box which also allows direct Google web searching and a star bookmarking icon. Extensions and browser settings icons line up to the right of the URL box. The third row is made up of bookmark folders and installed apps. Easily overlooked now, this clean UI was a breath of fresh air compared to the overcrowded toolbars of popular browsers pre-2008.
Privacy
Another hugely popular feature, Incognito mode allows you to browse privately by disabling history recording, reducing traceable breadcrumbs and removing tracking cookies on shutdown. Chrome’s settings also allow you to customize regular browsing privacy preferences.
Security
Chrome’s Sandboxing prevents malware automatically installing on your computer or affecting other browser tabs. Chrome also has Safe Browsing technology built in with malware and phishing protection that warns you if you encounter a website suspected of containing malicious software/activity. Regular automatic updates ensure security features are up to date and effective.
Customization
A vast selection of apps, extensions, themes and settings make your browsing experience unique to you. Improve productivity, security, navigation speed, pretty much anything you can think of with apps and extensions from the Google Chrome Store. Install themes created by top artists or make your own using mychrometheme.com. Sign in with your Google Account to back up your contacts, preferences, history as well as access all your Google tools with a single login.
The program provider has restricted distribution of older versions of this product.  


 DOWNLOAD HERE : CLICK HERE

Friday, April 11, 2014

How to Unlock Android Phone Pattern or Password Lock Easily – Step By Step Guide


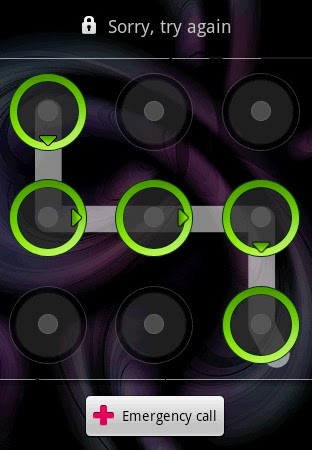
Android lock screen is a very strong protection of data on any android device. There may be times if you forget your pattern and want to reset it, this article shows how you can unlock your android pattern lock screen with very simple steps. This is an educational article. Try this at your own risk. This website is not responsible for any issue which may occur.

Steps to Unlock Android pattern lock:

1.Enabling USB Debugging:

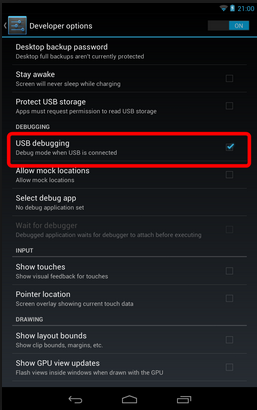
For this process to be a success, the device which you wish to unlock should be enabled with USB Debugging. For this go to Settings->Development->USB debugging and enable it.

2. Connect the device to the computer:

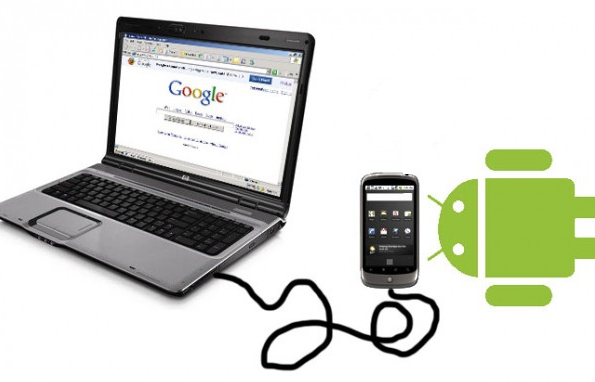
Now after making sure that the device is USB Debugging enabled, Connect it to the computer.
  • Go to start and open CMD.
  • Type the following code very carefully.
adb shell
  • Now press enter
rm /data/system/gesture.key

3. Reboot:

After giving the commands in the CMD, restart or reboot the android device. Now give any pattern and your device should be unlocked.
If you any doubts in the above process, please feel free to contact us. 

Wednesday, April 9, 2014

What’s new in Windows 8.1 Update and Windows RT 8.1 Update?

We periodically release updates for Windows to include new features, the latest security protection, and the best drivers and software. Windows 8.1 Update and Windows RT 8.1 Update include improvements to make Windows more familiar and convenient for devices that use touch and mouse input and to make Windows available on a wider variety of devices, so you have more to choose from. Windows 8.1 Update and Windows RT 8.1 Update also include security and performance updates, and they must be installed for your PC to receive any future security updates for Windows 8.1 or Windows RT 8.1.

Getting the update

If you're already running Windows 8.1 or Windows RT 8.1Windows 8.1 Update and Windows RT 8.1 Update are available for free through Windows Update. To see if you’re running the latest update, see Which Windows operating system am I running? Otherwise, to install the latest update, see Install the latest Windows 8.1 Update.

Easier access to your favorite apps and key controls

  • Power and Search buttons on the Start screen. These buttons appear in the upper-right corner of the Start screen next to your account picture. You'll be able to quickly and easily shut down your PC or search for things right from Start. (Some types of PCs don't have the Power button on Start. You can shut down your PC using the Power button in the Settings charm instead.) For more info, see Shut down (turn off), sleep, or hibernate your PC and How to search.
    Search and Power buttons on the Start screen
    Search and Power buttons on the Start screen
  • All open and pinned apps appear in the taskbar. If you like using the desktop, you'll see both desktop apps and apps from the Windows Store in your taskbar when they're running. You can also pin any app to the taskbar so you can quickly open or switch between apps from the desktop. For more info, see How to use the taskbar.
    Several apps listed in the taskbar
    Apps in the taskbar
  • Access the taskbar from anywhere. When you're using a mouse, you can see the taskbar from any screen, including Start or a Windows Store app. Move your mouse pointer below the bottom edge of the screen to show the taskbar and then click an app to open or switch to it.
  • Go to the desktop when you sign in, instead of Start. If you spend more time in the desktop, you can sign in (boot) directly to the desktop instead of the Start screen. And if you want to sign in to Start instead, you can change this setting at any time. For more info, see Desktop.

More familiar mouse and keyboard options

  • The Minimize button, Close button, and taskbar are more available with your mouse. Your mouse works more consistently anywhere in Windows. Move your mouse to the top of the screen to see Close and Minimize buttons in any app. Move your mouse down to the bottom of the screen to see the taskbar from anywhere in Windows. For more info, see How do I close an app? and How to use the taskbar.
    Close and Minimize buttons in an app's title bar
    Close and Minimize buttons
  • Right-click an app tile to see more options. If you’re using a mouse and you right-click a tile on Start, you’ll see a context menu next to the tile that shows what you can do with the tile.
    A context menu next to a tile after the tile was right-clicked
    A context menu when you right-click a tile

Simpler to find new apps

  • Discover apps in new ways. The Windows Store is pinned to Start and to your taskbar by default, so you can easily discover new apps. When you use the Search charm, Bing Smart Search includes apps in the suggestions and the search results.
  • Remember what apps you recently installed. After you install new apps, Start includes a message in the lower-left corner of the screen, pointing you to the Apps view so you can see what you recently installed.
    The lower-left corner of the Start screen with a down arrow and the message that apps have been recently installed
    The message about new apps on the Start screen

More PCs and devices to choose from

If you want to buy a new PC, Windows 8.1 Update runs on a wider variety of devices, so you'll have more to choose from, including budget-friendly laptops and tablets. For more info, see Windows PCs.

Benefits for businesses

For businesses customers, Windows 8.1 Update includes additional features that improve the compatibility of Internet Explorer, extend policy settings for mobile device management, and more easily install first-party apps for easier deployments across businesses.

this information is from microsoft

Saturday, April 5, 2014

Must share... More than 100 keyboard shortcuts
Keyboard Shortcuts (Microsoft Windows)
1. CTRL+C (Copy)
2. CTRL+X (Cut)
... 3. CTRL+V (Paste)
4. CTRL+Z (Undo)
5. DELETE (Delete)


6. SHIFT+DELETE (Delete the selected item permanently without placing the item in the Recycle Bin)
7. CTRL while dragging an item (Copy the selected item)
8. CTRL+SHIFT while dragging an item (Create a shortcut to the selected item)
9. F2 key (Rename the selected item)
10. CTRL+RIGHT ARROW (Move the insertion point to the beginning of the next word)
11. CTRL+LEFT ARROW (Move the insertion point to the beginning of the previous word)
12. CTRL+DOWN ARROW (Move the insertion point to the beginning of the next paragraph)
13. CTRL+UP ARROW (Move the insertion point to the beginning of the previous paragraph)
14. CTRL+SHIFT with any of the arrow keys (Highlight a block of text)
SHIFT with any of the arrow keys (Select more than one item in a window or on the desktop, or select text in a document)
15. CTRL+A (Select all)
16. F3 key (Search for a file or a folder)
17. ALT+ENTER (View the properties for the selected item)
18. ALT+F4 (Close the active item, or quit the active program)
19. ALT+ENTER (Display the properties of the selected object)
20. ALT+SPACEBAR (Open the shortcut menu for the active window)
21. CTRL+F4 (Close the active document in programs that enable you to have multiple documents opensimultaneously)
22. ALT+TAB (Switch between the open items)
23. ALT+ESC (Cycle through items in the order that they had been opened)
24. F6 key (Cycle through the screen elements in a window or on the desktop)
25. F4 key (Display the Address bar list in My Computer or Windows Explorer)
26. SHIFT+F10 (Display the shortcut menu for the selected item)
27. ALT+SPACEBAR (Display the System menu for the active window)
28. CTRL+ESC (Display the Start menu)
29. ALT+Underlined letter in a menu name (Display the corresponding menu) Underlined letter in a command name on an open menu (Perform the corresponding command)
30. F10 key (Activate the menu bar in the active program)
31. RIGHT ARROW (Open the next menu to the right, or open a submenu)
32. LEFT ARROW (Open the next menu to the left, or close a submenu)
33. F5 key (Update the active window)
34. BACKSPACE (View the folder onelevel up in My Computer or Windows Explorer)
35. ESC (Cancel the current task)
36. SHIFT when you insert a CD-ROMinto the CD-ROM drive (Prevent the CD-ROM from automatically playing)
Dialog Box - Keyboard Shortcuts
1. CTRL+TAB (Move forward through the tabs)
2. CTRL+SHIFT+TAB (Move backward through the tabs)
3. TAB (Move forward through the options)
4. SHIFT+TAB (Move backward through the options)
5. ALT+Underlined letter (Perform the corresponding command or select the corresponding option)
6. ENTER (Perform the command for the active option or button)
7. SPACEBAR (Select or clear the check box if the active option is a check box)
8. Arrow keys (Select a button if the active option is a group of option buttons)
9. F1 key (Display Help)
10. F4 key (Display the items in the active list)
11. BACKSPACE (Open a folder one level up if a folder is selected in the Save As or Open dialog box)
Microsoft Natural Keyboard Shortcuts
1. Windows Logo (Display or hide the Start menu)
2. Windows Logo+BREAK (Display the System Properties dialog box)
3. Windows Logo+D (Display the desktop)
4. Windows Logo+M (Minimize all of the windows)
5. Windows Logo+SHIFT+M (Restorethe minimized windows)
6. Windows Logo+E (Open My Computer)
7. Windows Logo+F (Search for a file or a folder)
8. CTRL+Windows Logo+F (Search for computers)
9. Windows Logo+F1 (Display Windows Help)
10. Windows Logo+ L (Lock the keyboard)
11. Windows Logo+R (Open the Run dialog box)
12. Windows Logo+U (Open Utility Manager)
13. Accessibility Keyboard Shortcuts
14. Right SHIFT for eight seconds (Switch FilterKeys either on or off)
15. Left ALT+left SHIFT+PRINT SCREEN (Switch High Contrast either on or off)
16. Left ALT+left SHIFT+NUM LOCK (Switch the MouseKeys either on or off)
17. SHIFT five times (Switch the StickyKeys either on or off)
18. NUM LOCK for five seconds (Switch the ToggleKeys either on or off)
19. Windows Logo +U (Open Utility Manager)
20. Windows Explorer Keyboard Shortcuts
21. END (Display the bottom of the active window)
22. HOME (Display the top of the active window)
23. NUM LOCK+Asterisk sign (*) (Display all of the subfolders that are under the selected folder)
24. NUM LOCK+Plus sign (+) (Display the contents of the selected folder)
MMC Console keyboard shortcuts
1. SHIFT+F10 (Display the Action shortcut menu for the selected item)
2. F1 key (Open the Help topic, if any, for the selected item)
3. F5 key (Update the content of all console windows)
4. CTRL+F10 (Maximize the active console window)
5. CTRL+F5 (Restore the active console window)
6. ALT+ENTER (Display the Properties dialog box, if any, for theselected item)
7. F2 key (Rename the selected item)
8. CTRL+F4 (Close the active console window. When a console has only one console window, this shortcut closes the console)
Remote Desktop Connection Navigation
1. CTRL+ALT+END (Open the Microsoft Windows NT Security dialog box)
2. ALT+PAGE UP (Switch between programs from left to right)
3. ALT+PAGE DOWN (Switch between programs from right to left)
4. ALT+INSERT (Cycle through the programs in most recently used order)
5. ALT+HOME (Display the Start menu)
6. CTRL+ALT+BREAK (Switch the client computer between a window and a full screen)
7. ALT+DELETE (Display the Windows menu)
8. CTRL+ALT+Minus sign (-) (Place a snapshot of the active window in the client on the Terminal server clipboard and provide the same functionality as pressing PRINT SCREEN on a local computer.)
9. CTRL+ALT+Plus sign (+) (Place asnapshot of the entire client window area on the Terminal server clipboardand provide the same functionality aspressing ALT+PRINT SCREEN on a local computer.)
Microsoft Internet Explorer Keyboard Shortcuts
1. CTRL+B (Open the Organize Favorites dialog box)
2. CTRL+E (Open the Search bar)
3. CTRL+F (Start the Find utility)
4. CTRL+H (Open the History bar)
5. CTRL+I (Open the Favorites bar)
6. CTRL+L (Open the Open dialog box)
7. CTRL+N (Start another instance of the browser with the same Web address)
8. CTRL+O (Open the Open dialog box,the same as CTRL+L)
9. CTRL+P (Open the Print dialog box)
10. CTRL+R (Update the current Web page)
11. CTRL+W (Close the current window)

Tuesday, April 1, 2014


How far do u know?


1 Bit = Binary Digit
4 bits = 1 Nibble
8 Bits = 1 Byte
1024 Bytes = 1 Kilobyte
1024 Kilobytes = 1 Megabyte
1024 Megabytes = 1 Gigabyte
1024 Gigabytes = 1 Terabyte
1024 Terabytes = 1 Petabyte
1024 Petabytes = 1 Exabyte
1024 Exabytes = 1 Zettabyte
1024 Zettabytes = 1 Yottabyte
1024Yottabytes = 1 Brontobyte
1024 Brontobytes = 1 Geopbyte
1024 Geopbyte=1 Saganbyte
1024 Saganbyte=1 Pijabyte
Alphabyte = 1024 Pijabyte
Kryatbyte = 1024 Alphabyte
Amosbyte = 1024 Kryatbyte
Pectrolbyte = 1024 Amosbyte
Bolgerbyte = 1024 Pectrolbyte
Sambobyte = 1024 Bolgerbyte
Quesabyte = 1024 Sambobyte
Kinsabyte = 1024 Quesabyte
Rutherbyte = 1024 Kinsabyte
Dubnibyte = 1024 Rutherbyte
Seaborgbyte = 1024 Dubnibyte
Bohrbyte = 1024 Seaborgbyte
Hassiubyte = 1024 Bohrbyte
Meitnerbyte = 1024 Hassiubyte
Darmstadbyte = 1024 Meitnerbyte
Roentbyte = 1024 Darmstadbyte
Coperbyte = 1024 Roentbyte
Share this & Let others know about this..

 How to quickly rename multiple files in Windows


Rename multiple files in Microsoft Windows XP Explorer by following the below steps.


1. Open Explorer.
2. In Explorer select all the files you wish to rename.
3. Once the files have been selected press F2 and type the new name for the files. For example, typing "test" will rename the files to test, test(1), test(2), test(3) etc. If you have show file extensions enabled, make sure to also type the name of the file extension you're renaming.

Android Launchers

Top Five Best 2014 Android Launchers for Android or smartphone

 Operating System has incredible features when compare to other operating System, many customisable features are available in the Android. Best Advantage of using Android is for these special features. Launchers i don't think this sounds new to you because many Android users use this feature. launchers change the complete look of the home screen. It gives new look to the user when compare to the normal one.

Top Five Best Android Launchers of 2014

While coming to iPad or iPhone you won't have that opportunity i.e; installing launchers on your device. Whereas when coming to Android App store "Google Play store" you have a number of launchers.
The below mention Launchers are the best one available in Android 2014 market.

Smart Launcher

Smart Launcher is another innovative choice for your home screen given its minimalist design. It replaces your icons with flatter, more refined alternatives. It is Ready to use without special configurations. Live Wallpaper Support It supports every screen and device (Google TV too!!)Widget support (PRO version only)Support of set of icons for ADW Launcher, Apex Launcher, Nova Launcher and Launcher Pro. Possibility to change a single icon in the drawer.You can hide every app you want by long pressing an app, then select menu → Hide.Quick search.

unnamed

Nova Launcher

Nova Launcher is one of the most popular launchers with over 5,000,000 installs, according to its Google Play page. It Features include:
• Colour Themes, Change the accent colour of the launcher, full colour picker support, Icon Themes
• Apply ADW or Go launcher icon themes to all app icons.
• Scrolling style, choose between horizontal paginated or vertical continuous.
• Enjoy eye candy when scrolling your desktop and drawer.
• Effects include Cube and Cardstack and more for Prime users.
• Infinite Scroll, Never be far from your favourite page, loop through your desktop continuously, Folder Icons, You can chose a background, preview style or even replace the whole icon., Backup/Restore an many more.
unnamed+(1)


Apex Launcher


It carries many of the same type of customisations found in Nova Launcher
Features:
• Customisable home screen grid size and up to 9 home screens
• Scrollable dock with up to 7 icons per page and up to 5 pages
• Infinite & elastic scrolling (home screen, drawer and dock)
• Fancy transition effects (tablet, cube, etc.)
• Hide elements as you want (persistent search bar, status bar, or even the dock)
• Customisable icons and labels for shortcuts and folders
• Choose different folder preview styles and background.
unnamed+(2)

Action Launcher

Action Launcher is something special. It has outstanding features like
• A sliding Quick drawer for instant access to all your apps and widgets.
• Covers, an innovative new way to quickly launch apps and shortcuts without compromising the look of your carefully crafted home screen.
• Shutters, a unique feature that unlocks the power and potential of Android widgets. Swipe an app icon, and that apps widget is automatically created and displayed.
• Quick page, a fully featured home screen accessible from the right edge of the screen.
• With 1-Swipe, you can access the Quick drawer and Quick page from any app on your device, whether Action Launcher is running or not (Pro only).
• Android's unique and powerful action bar is fully integrated into your desktop.
unnamed+(3)

Guide For Fixing "USB Device Is Not Recognized' Issue in Windows 8 / 8.1


I found this common issue when my friends and Co-Bloggers are facing so i thought to solve this issue, Sometimes WINDOWS 8 can fail to detect certain USB devices when connected. The most common thing users do when they face this issue is they try removing other connected USB devices, restarting the computer, and then reconnecting only the target USB device to the computer, without connecting the other devices at all.
Guide-Fixing-USB-Device-Is-Not-Recognized-Issue-in-Windows+8

How to Solve this "USB Device Is Not Recognized' Issue?

  • Log in to your Windows 8 computer with the administrator account.
  • Make sure that the computer is connected with an active Internet connection.
  • Click Desktop tile from the Start screen to go to the desktop window.
  • Move your mouse to the bottom right corner of the window and then click Settings.
  • Next click Control Panel.
  • On Control Panel window, click Hardware and Sound.
  • On Hardware and Sound window, click Device Manager under Devices and Printers category from the right pane.
  • On Device Manager window, expand the Universal Serial Bus controllers category.
  • Once expanded, right-click the USB controller that is to be updated.
  • From the context menu that appears, click Update Driver Software to update the driver of the selected USB controller.
  • On the displayed box, click Search automatically for updated driver software to make the Windows to search for the updated driver from the Internet.
  • Click Close after the update is finished.
A Computer Trick For you to Access instant things! Share with your Friends

1. Accessibility Controls - access.cpl
2. Accessibility Wizard - accwiz
3. Add Hardware Wizard - hdwwiz.cpl
4. Add/Remove Programs - appwiz.cpl
5. Administrative Tools - control admintools
6. Automatic Updates - wuaucpl.cpl
7. Bluetooth Transfer Wizard - fsquirt
8. Calculator - calc
9. Certificate Manager - certmgr.msc
10. Character Map - charmap
11. Check Disk Utility - chkdsk
12. Clipboard Viewer - clipbrd
13. Command Prompt - cmd
14. Component Services - dcomcnfg
15. Computer Management - compmgmt.msc
16. Control Panel - control
17. Date and Time Properties - timedate.cpl
18. DDE Shares - ddeshare
19. Device Manager - devmgmt.msc
20. Direct X Troubleshooter - dxdiag
21. Disk Cleanup Utility - cleanmgr
22. Disk Defragment - dfrg.msc
23. Disk Management - diskmgmt.msc
24. Disk Partition Manager - diskpart
25. Display Properties - control desktop
26. Display Properties - desk.cpl
27. Dr. Watson System Troubleshooting Utility - drwtsn32
28. Driver Verifier Utility - verifier
29. Event Viewer - eventvwr.msc
30. Files and Settings Transfer Tool - migwiz
31. File Signature Verification Tool - sigverif
32. Findfast - findfast.cpl
33. Firefox - firefox
34. Folders Properties - control folders
35. Fonts - control fonts
36. Fonts Folder - fonts
37. Free Cell Card Game - freecell
38. Game Controllers - joy.cpl
39. Group Policy Editor (for xp professional) - gpedit.msc
40. Hearts Card Game - mshearts
41. Help and Support - helpctr
42. HyperTerminal - hypertrm
43. Iexpress Wizard - iexpress
44. Indexing Service - ciadv.msc
45. Internet Connection Wizard - icwconn1
46. Internet Explorer - iexplore
47. Internet Properties - inetcpl.cpl
48. Keyboard Properties - control keyboard
49. Local Security Settings - secpol.msc
50. Local Users and Groups - lusrmgr.msc
51. Logs You Out Of Windows - logoff
52. Malicious Software Removal Tool - mrt
53. Microsoft Chat - winchat
54. Microsoft Movie Maker - moviemk
55. Microsoft Paint - mspaint
56. Microsoft Syncronization Tool - mobsync
57. Minesweeper Game - winmine
58. Mouse Properties - control mouse
59. Mouse Properties - main.cpl
60. Netmeeting - conf
61. Network Connections - control netconnections
62. Network Connections - ncpa.cpl
63. Network Setup Wizard - netsetup.cpl
64. Notepad - notepad
65. Object Packager - packager
66. ODBC Data Source Administrator - odbccp32.cpl
67. On Screen Keyboard - osk
68. Outlook Express - msimn
69. Paint - pbrush
70. Password Properties - password.cpl
71. Performance Monitor - perfmon.msc
72. Performance Monitor - perfmon
73. Phone and Modem Options - telephon.cpl
74. Phone Dialer - dialer
75. Pinball Game - pinball
76. Power Configuration - powercfg.cpl
77. Printers and Faxes - control printers
78. Printers Folder - printers
79. Regional Settings - intl.cpl
80. Registry Editor - regedit
81. Registry Editor - regedit32
82. Remote Access Phonebook - rasphone
83. Remote Desktop - mstsc
84. Removable Storage - ntmsmgr.msc
85. Removable Storage Operator Requests - ntmsoprq.msc
86. Resultant Set of Policy (for xp professional) - rsop.msc
87. Scanners and Cameras - sticpl.cpl
88. Scheduled Tasks - control schedtasks
89. Security Center - wscui.cpl
90. Services - services.msc
91. Shared Folders - fsmgmt.msc
92. Shuts Down Windows - shutdown
93. Sounds and Audio - mmsys.cpl
94. Spider Solitare Card Game - spider
95. SQL Client Configuration - cliconfg
96. System Configuration Editor - sysedit
97. System Configuration Utility - msconfig
98. System Information - msinfo32
99. System Properties - sysdm.cpl
100. Task Manager - taskmgr
101. TCP Tester - tcptest
102. Telnet Client - telnet
103. User Account Management - nusrmgr.cpl
104. Utility Manager - utilman
105. Windows Address Book - wab
106. Windows Address Book Import Utility - wabmig
107. Windows Explorer - explorer

TEN EASY WAYS TO BACK UP AND RESTORE YOUR PHONE CONTACTS


"BACK UP AND RESTORE PHONE CONTACT" - Interesting Title from all my other posts because many of them face this Problem normally When you lost your phone? While upgrading to a new one? You shouldn't have to give up that painstakingly crated list of contacts. Keep multiple backups of your contacts, both on the device as well as the cloud. 
TEN-EASY-WAYS-TO-BACK-UP-AND-RESTORE-PHONE-CONTACTS


Phonecopy:
One of the few cross platform services available, PhoneCopy lets you back up your phone contacts, messages & calendar entries and sync them across all the devices you own. You need to signup for a free account so that your data can be stored on the PhoneCopy servers. PhoneCopy offers free apps for all smartphones and also works with some feature phones that support synchronisation over a data connection. You can check if your feature phone is supported on phonecopy.com. Once your contacts are saved to their servers, you can access and edit them from anywhere by just logging in from a web browser. 

Download Here : Android | iOS | BlackBerry

Lookout:Lookout is a complete security app for your smartphone. Apart from the usual security features like tracking, remote wipe and a privacy advisor, it offers a contacts backup solution. It saves all your contacts to the cloud from which they can be restored or downloaded to a PC anytime.

Download Here : Android | iOS  

My Contacts Backup: If you prefer to store local (offline) copies of your contacts, this free app is the solution. It offers one-touch backup of your contacts to your device in VCF format and even lets you export them to CSV format (as a spreadsheet). You can choose to save the backup file on cloud storage or just email it to yourself.

Download Here : Android | iOS

InDefend:
To use InDefend, you need to first sign up for a free account. This step is essential because it lets you connect two Android devices for backup and quick restore. All your data is encrypted and stored on InDefend's servers from where you can access it anytime. Apart from contacts, this free app also lets you backup other data from your phone. 

Download Here : Android 

Contacts Backup:
This free app has a plain and simple interface. It works with multiple accounts that you have added to your Windows Phone device. You can choose which accounts to use and it creates a contacts (VCF) file that is saved to your OneDrive (previously SkyDrive) cloud storage. You can even choose to save it locally on your device. Note that it does not support restore of contacts.
Download Here : Windows 

SanDisk Memory Zone:
This multi-faceted free app lets you back up any file to your phone's memory card, move files from your phone's internal memory to memory card and sync data with your cloud service of choice (just sign in to Dropbox, Box, Google Docs, SugarSync or OneDrive from within the app). You can also use the password protection feature to keep your data safe.
Download Here : Android 

Go Contacts Pro:Although Go contacts Pro is more of a phonebook/dialer replacement for Android, it comes with an easy-to-use backup feature; it lets you export contacts to device storage as a single VCF file. You can then transfer this file to another device and use the app to Import all the contacts to your new device. You can also use the app to import contacts stored on your sim card.

Download Here : Android 

Easy Backup - My Contacts Backup Assistant:
One of the rare free contacts backup solutions for any iOS device, Easy Backup lets you do a one-touch backup of all your contacts. You can then choose to email the backup to yourself or upload it to Dropbox/Google Drive. The backup can be restored to your device using the native mail app.

Download Here : iOS  

Contacts Backup for BlackBerry 10 (BlackBerry) 
This free app offers basic options to backup or restore your contacts. It saves all your backup files in an XML format and displays a list of various backups made on your device. You can choose to delete all existing contacts before restoring a backup file. Users of older BlackBerry devices can use the free Backup Contacts app by Amaira Soft.

Download Here : BlackBerry

Backup contacts to your computer:
Almost all the major brands have their own free desktop software which you should install for regular backups. There are usually two options available: to backup phone contents to the computer so that you can restore the data if needed or to sync contacts with an address book (Windows/Apple Address Book, Outlook/Outlook Express). If you have an Android phone, give MoboGenie a try (mobogenie.com). MoboGenie is a free program that works with most Android devices. It can safely store a backup of your personal information locally, on your computer.

Change Windows Password Without Knowing Old One

Dear BestHacking readers today I am going to tell you a trick to change windows password without knowing it. As you all know without knowing the old password we are unable to change it but by following the few steps given below will help you to change it easily. This trick works for Windows Vista, Windows XP, Windows 7, Windows8.
Procedure For Changing Windows Password Without Knowing Old
Step 1 :
Start Menu > Computer > Right Click > Manage
Step 2 :
System Tool > Local User and Group

Step 3 :
Double Click on User (exp. your Pc Name )
Step 4 :
Chose User > Right Click on It > Set Password
Step 5 :
Click on Proceed button
Step 6 :
Then Set your New Passowrd

Downloads adda.com Downloadsadda © 2014. All Rights Reserved | Powered by-Blogger